From Code to App Store and Google Play: Automating iOS and Android CI/CD with Jenkins and Fastlane

Are you tired of being the only engineer with access to App Store Connect and Google Play private keys and certificates, and getting called after work hours to trigger an urgent beta or production release for both platforms at the same time?
This happened to me when I was working on a React Native project, and it was a nightmare. Not only did I have to access and download the certificates required for a successful code sign, but I also had to make sure the source code built correctly in my local environment. On top of that, different dev teams wanted builds from their own feature branches or from the main branch.
If you are going through the same nightmare, I’ll share how I successfully contributed to that React Native project and solved this problem using Jenkins and Fastlane.
Context:
- An e-commerce app built with React Native and available simultaneously in the App Store and Google Play, including TestFlight and Google Play Closed Testing for beta releases.
- My Apple Developer account with access to download a signing certificate and provisioning profile to be able to generate an
.ipafile. For Google Play Console, I had access to the necessary app signing key to create an.aabfile for the same purpose. - A Jenkins master server that orchestrates jobs and a macOS build agent (slave) capable of executing Fastlane scripts as well as Xcode build and sign processes.
Solution:
TL;DR
A Heads up
React Native provides built-in scripts that are handy for basic tasks like running the app, but unfortunately they lack a robust toolchain for release automation. Let’s explore how Jenkins and Fastlane can fill this gap and bring powerful automation to React Native projects.
Breaking Down Signing Certificates and Provisioning Profiles for the App Store
As mentioned earlier, certificates and profiles are not meant to be shared with other developers (at least in theory—I’ve seen this happen many times). This tutorial assumes you already have access and that these files are downloaded on your macOS system. By the end of the tutorial, there will be no need to share them anymore, since they will be stored on the macOS build agent, which will be solely responsible for building the apps.
Signing certificate
- Development certificate: Used to sign apps for testing on registered devices. This should have your name on it and only works on devices that are already registered.
- Distribution certificate: Used for submitting apps to the App Store or for ad-hoc distribution (reference). This is the certificate a dedicated distribution server will use for automation.
Let’s get it done!
Provisioning profile
- Development provisioning profile: For testing your app only on registered test devices (tied to the development certificate above).
- Distribution provisioning profile: For distributing your app through the App Store or TestFlight (reference)
Jenkins and Chamber of Secrets
Coming soon
Verify Your Profile, Team, and Certificate Locally
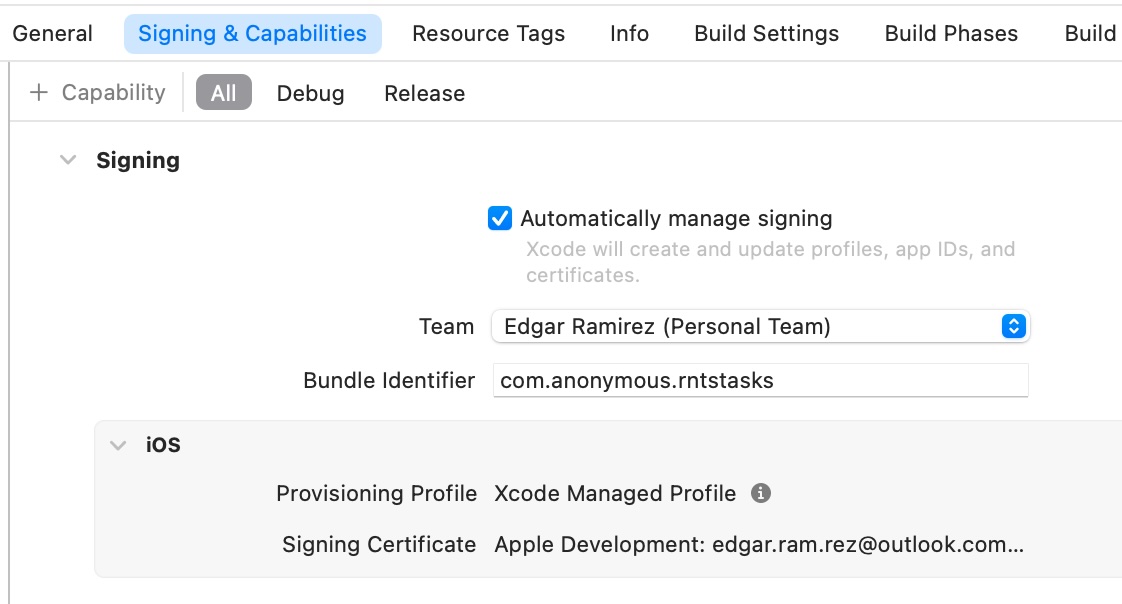
Xcode simplifies this process with the Automatically manage signing option in project settings.
- Navigate to the
iosfolder inside your React Native project. - Open the generated Xcode project, for example:
ios/MyAwesomeApp.xcworkspace - Select your project, go to settings, and click the Signing & Capabilities tab.
- Enable Automatically manage signing

- Choose your Team and enter the Bundle Identifier that was registered in App Store Connect. Everything should work fine as long as the signing certificate has been properly stored as explained earlier.
Here’s an example of how your Signing & Capabilities tab should look if profiles and certificates are configured correctly:
- Go to Product > Archive to generate the archive required before distribution to TestFlight or the App Store. Verify that the archive was created successfully.
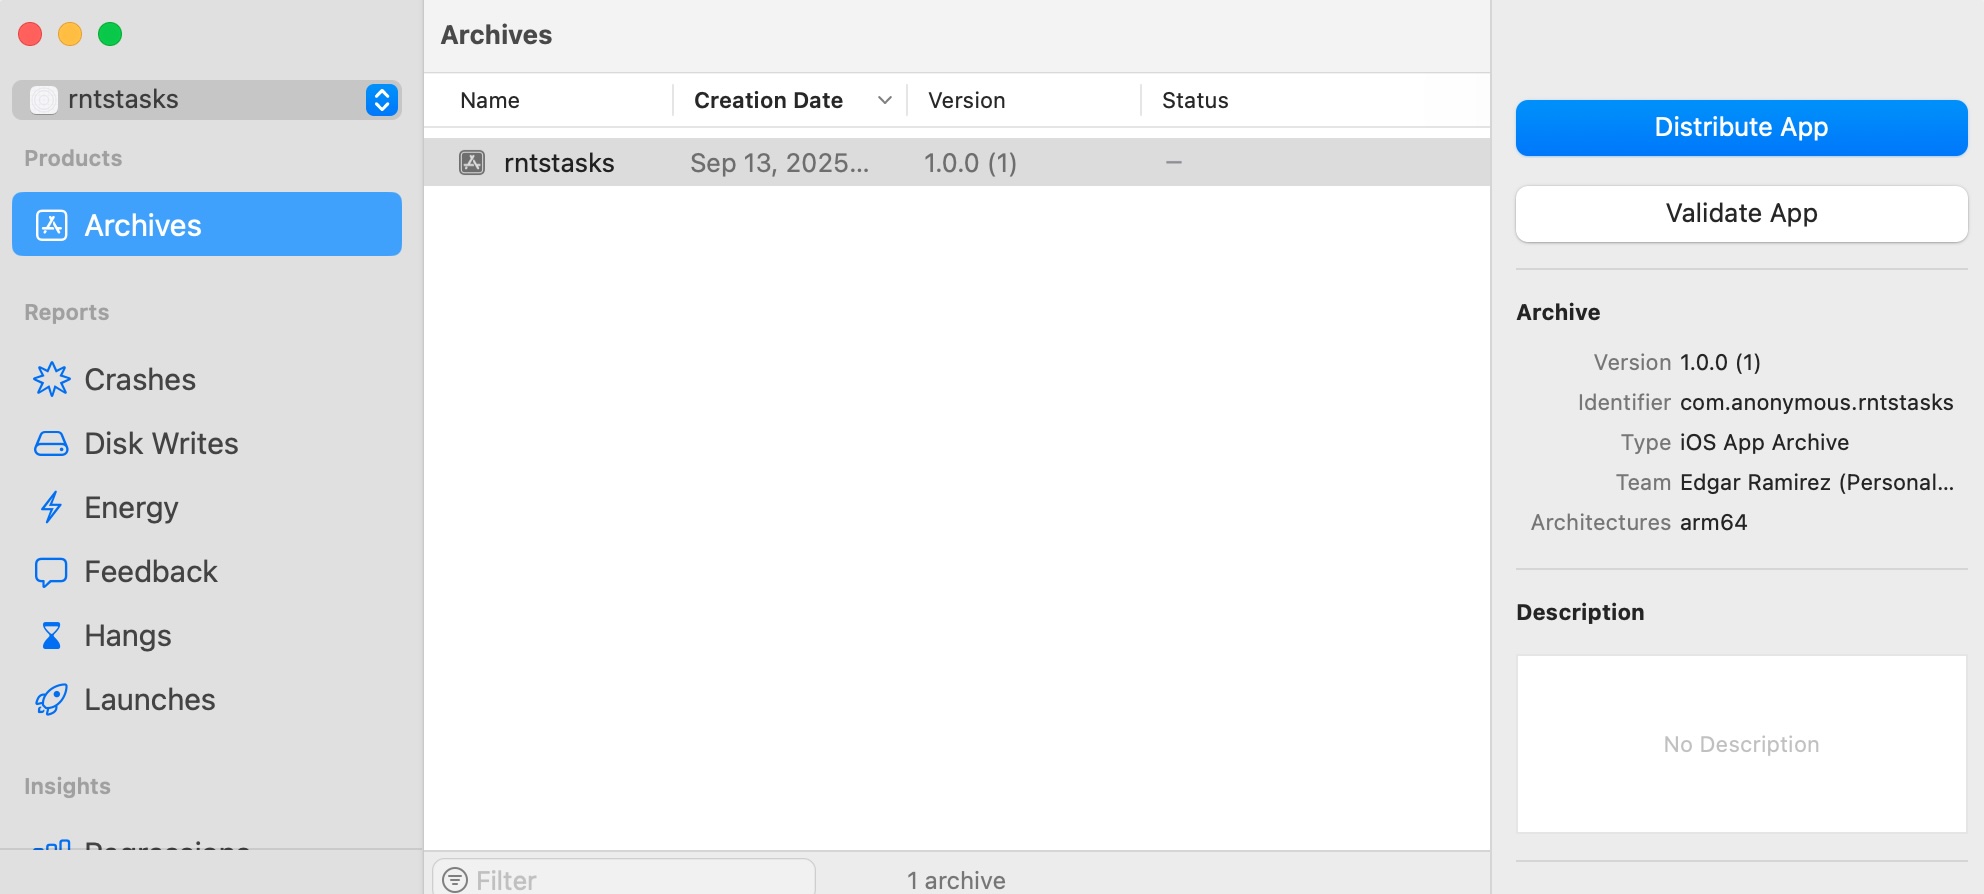
- Select the archive and click Distribute App. Then select App Store Connect (for TestFlight and App Store) or Export to create an .ipa file locally. This
.ipafile will later be uploaded by your CI/CD pipelines.
⛳️ Checkpoint: These steps confirm that your source code, certificates, and profiles from App Store Connect are properly set up on your local macOS machine. Next, we’ll configure the same setup on the macOS build agent used by your mobile pipelines.